How to Make Rainbow Jell-O Push Ups
May 26, 2011 by ThePartyAnimal
Filed under Fun Treats
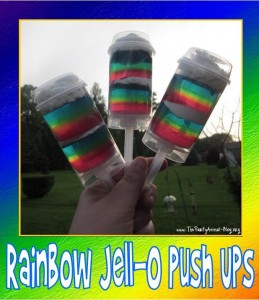
 Here is a Colorful Treat the kids are going to love and are perfect for your Summer Parties. These Rainbow Jell-O Push Ups are EASY to make, taste good and mess free !!
I recently purchased these Clear Push Up Containers that are all the rage right now. They are just Containers that have a Slider which pushes up the treat from the bottom. You mostly see them being used for Cake, but I have been having a lot of fun with them. The first thing I created using them were these Hot Fudge Sundae Brownie Push Ups and they were a huge hit with my family and friends. So I thought I would try my hand at another cool treat that would be prefect for Summer and that is where my idea to use Jell-O came from.
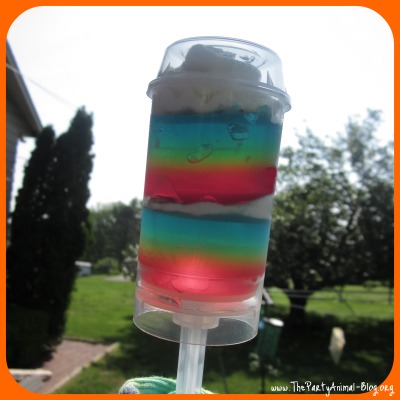
I decided to create Rainbow Jell-O because the containers are clear and I had visions of how cool it would look and ya know what? I was right. When they were held up to the sunlight they were Awesome !! Pictures did not do them justice.
Now I am going to show you how I did it, Step by Step as I made them for the very 1st time.
Here is what I used to create my Rainbow Jell-O Push Ups:
-
Clear Push Up Containers

- Cherry Jell-O, Lemon Jell-O and Berry Blue Jell-O
- Knox Unflavored Gelatine – 3 Packets
- Cool Whip
 Creating the Rainbow Jell-O is a little bit of a process, but only because you have to layer the flavors and wait for them to set. They will set Thick just like Jell-O Jigglers, As you see I only used 3 flavors, but when layered they create all the colors when they touch in the end (I know cool right?). I took a 13′ x 9″ baking dish and gave it a light spritz with Cooking Spray. I started with the bottom layer first which would be the Berry Blue Jell-O. In a mixing bowl I mixed 1 box of the Berry Blue Jell-O and 1 Packet of the Knox Unflavored Gelatine with 2 Cups of boiling water and mixed until dissolved. I then added in about 1/2 Cup of Ice Cubes and mixed them in until you could sorta feel the Jell-O get thicker (it will not get very thick, but you will feel the difference). You can dissolve the Ice Cubes fully or remove the pieces when you feel it is good.
Once done pour that into the dish and stick in the fridge to set up nice and firm. This may take 1 – 2 hours.
Once that is set you are going to repeat the above process with the next flavor/layer which will be the Lemon Jell-O and then the Cherry Jell-O.

 Once it was all set I took a cutting board placed it on the top and flipped it over and the Jell-O slipped right out. The next part was a bit of trail and error. First I took one of the containers and pushed it into the Jell-O to get the shape to go in, but once it lifted off the Jell-O expanded and you could not get it back in the container. So I then took the container and marked the top of the Jell-O to get the size and then I cut the shape out using a knife a tiny bit smaller. You can also use the right sized circle cookie cutter for this, but I did not have one on hand (on my list). So I cut out all my Circles which worked just fine. I made sure to have 2 of the Jell-O Circles for each Push Up Container.
Check out the Rainbow Jell-O when held up to the light – WoW !!

 The Assembly is very easy. I took my Cool Whip and put it into a Ziploc Baggie and cut off the tip. I then took one Jell-O Circle and placed it into the bottom of the container. I added a layer of Cool Whip, placed another Jell-O Circle on top and then one more nice layer of Cool Whip. I stuck on the Top and it was complete and ready to eat. How EASY is that?
My kids dug right in and the rest went into the Fridge for later !!

 So what did I do with all of those Jell-O scraps from around the circles? Well I cut them up into Squares and placed them into a fancy Glass Martini Glass, topped with Cool Whip added a Cherry to the Top and gave it to my daughter !! Yet another very colorful treat !!
 Now how Pretty is that? It tasted just as good as it looked too, I know because I ate one !!
What a fun treat to have at your next Party for the Kids and the Adults too !! The colors will definitely brighten any day and you can do any flavor you like – have fun with it !!
If you make some Jell-O Push Ups – send me a picture to share.


ROY G. BIV loves this!!!!!!!!